Are you looking to purchase flame-resistant (FR) fabric but unsure where to start? Do you need help understanding the different test methods used to measure materials as flame resistant?
In this guide, I will break down the process of the fabric flammable test step by step. You can quickly implement it in your own office or home.
By following our simple guide, you’ll be able to select the right FR fabric for your next project confidently!
What tools do you need?
The 3-Materials you will need to perform the test:
● Metal Clips
● Metal Hanger & Stand
● Cigarette lighter, Stove Lighter, or Jet Torch Lighter ( Preferable )
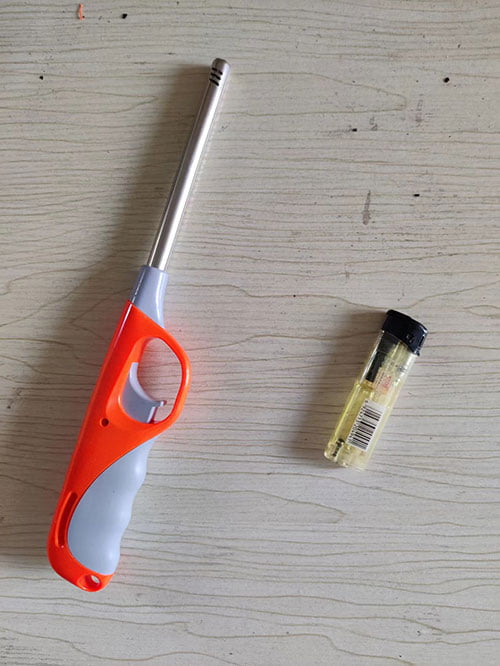
You can easily find these materials at home or office. For example, for clips, you can use stainless steel cloth clips, use a metal hanger from your dressing, and get lighter from the kitchen.
Yes, you may find it challenging to find a metal stand, but you can use a stick to fix the hanger away from the walls and ground.
The purpose of the material is to hold the fabric swatch vertically for testing. You can use any way you can fix the test fabric. But please remember to avoid any flammable materials.
Implement the flammability test in 3-Easy Steps.
This test is based on ISO 15025:2016, a test method for limited flame spread on protective clothing & textiles. But way easier. We can use this test to determine the flammability of your fabric.
After preparing all these tools, you can now move on to performing the actual test following the three steps below.
Step 1: Prepare the specimen.
- Cut the fabric into 200 mm (length) x 200 mm (width) pieces for the test.
- Prepare at least 3-test specimen fabric samples for more accurate results.
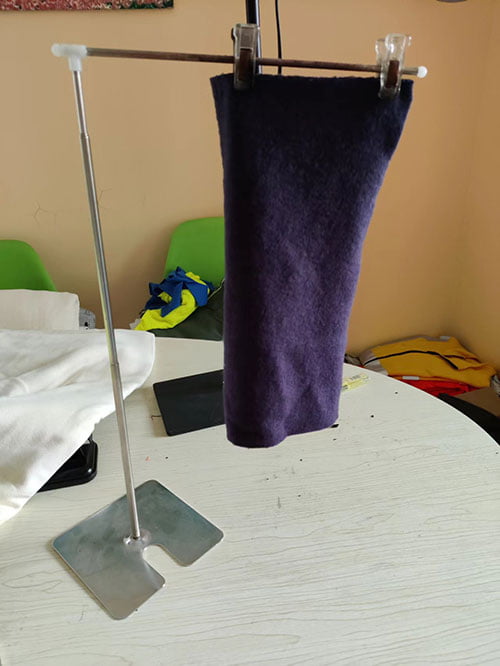
Step 2: Hang & fix
- Using metal clips, fix the test fabric on the hanger stand.
- If the stand is unavailable, fix the hanger on some stick or rope.
- Make sure the fabric swatch is away from the tabletop.
Step 3: Ignition
Two procedures are typically applied to ignite the fabric with a small defined flame from a lighter or torch.
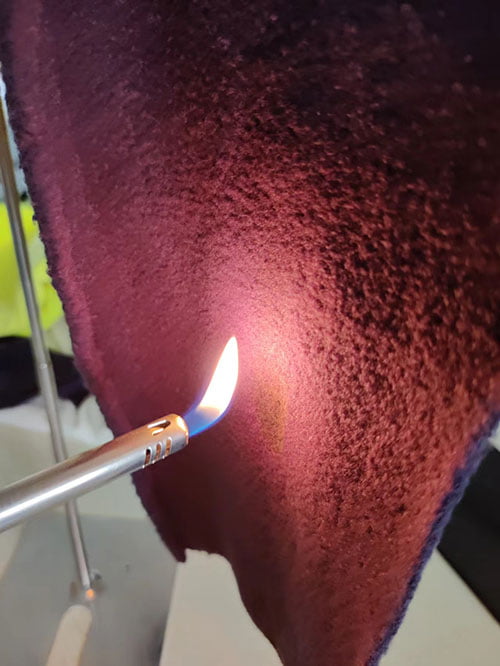
a) Surface Ignition Method
- Apply flame horizontally to the surface of the fabric.
- Flame duration up to 10 seconds
![]()
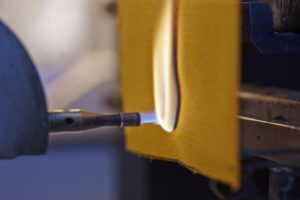
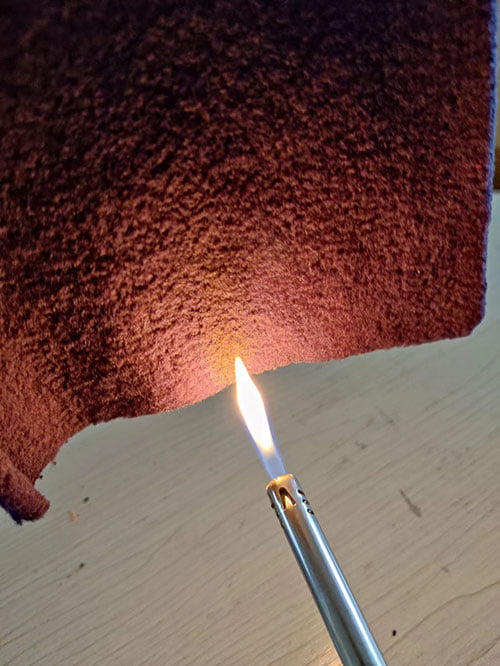
b) Vertical Ignition Method
As flame is concentrated below the bottom edge and reaches both sides, this method puts more strain on the vertically oriented fabrics. In this method;
- The Lighter is placed just under the fabric, at an angle of 30°.
- Flame duration up to 10 seconds
![]()
“If using a kitchen lighter, you can place it near the fabric, but if using a jet torch lighter, place the torch about 30 mm away from the fabric.”
Observeation & Record
Write down some critical data during and after the incineration process, and the results will indicate the fabric’s quality.
a) Burning Time
It’s the duration that the fabric is exposed to flame. Keep the fire applying to the specimen for about 10 seconds and note it carefully. You can count from 1 to 10 by yourself or using the timing App on your mobile.
b) After-Flame Time
It’s the duration of flame on the fabric after the fire source is removed. You can imagine it like the flame of a dying candle.
Usually, the after-flame time below 1.0 seconds is considered zero or negligible, which means if the flame extinguishes completely within 1.0 seconds after the fire source is removed, then FR fabric is a Great Self-Extinguish material.
c) After-Glow Time
After the ending of the flame on fabric, the glowing on textile is called After-glow, and the duration time is after-glow time.
The after-glow time below 1.0 seconds is considered zero or negligible.
“Please note that after-glow may cause the fabric to ignite again ( after flame ) under certain conditions.” It’s like seeing a candle that has been extinguished—after-glow on the cotton wick. After a while, it burns again.
d) Hole Formation
If there are 5 mm or larger holes in the fabric, you will know that the textile material is not qualified and is of cheaper quality.
e) Char Length
Char forms due to igniting flame retardant fabrics and carbonization (blackening) at the edges of the burn. This char can either remain on the garment or fall off as debris.
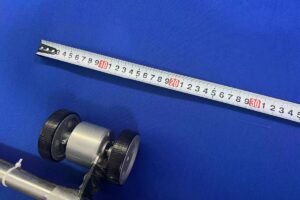
How far the char formation happens on the fabric is called Char Length. You can measure it by:
- Tear the fabric along the axis where the most charring occurs. Until the carbonized part is completely gone
- And use a ruler to measure the length of the tear.
| Testing Items | Results |
|---|---|
| Burning Time | |
| After-flame Time | |
| After-glow Time | |
| Hole formation | |
| Char length |
Limitations & Cautions
The EN ISO 15025:2016 test standard states that this should use a fire source of 95% Propane gas jet burner.
However, we are using butane or other usual gas lighters with much smaller flame temperature & throw, affecting the results. Plus, this test requires an ideal environment that is not available at home or office.
So, this test is not that accurate. Still, it does help in determining flame spread properties of single or multicomponent fabrics Protective Clothing.
In addition, ISO 15025:2016 test is not designed for materials that demonstrate extensive melting or shrinkage; this home-made also has the same limitations.
Tips for Accurate Results
- Use a Jet Burner Torch instead of a lighter.
- Place the specimens at least 300 mm away from the walls.
- Perform the test at normal humidity levels, which are 30-50%.
- Perform the test with the same fabric material at least 3-times for accurate results.
- Do not perform the test in either intense heat or intense cold. ( Ideal Temperature 20° ~ 25° Celcius ).
- If using a cigarette/stove lighter, keep it as close to the fabric as possible due to the small flame throw limit.
- Do not perform the test in a restricted air supply; there should be a constant flow of air to provide oxygen for proper burning.
Summary
Now let’s quickly review the testing process again
First, prepare the tools for the test. Then you want to cut the specimen to the required size.
Hang the swatch, then perform surface & edge ignition for 10 seconds, and record the following data separately:
a) After-flame Time
b) After-glow Time
c) Hole Formation
d) Char length
If you are looking to find FR fabric for base layers, outerwear, high-vis clothing, or any other purposes, then we at WOKI® can provide you with premium quality but at a cost-effective price.
Our Fabrics are lightweight, breathable, and moisture-wicking. They are designed for the workers in industrial sectors. While wearing WOKI® fabric clothing, one does not have to worry about electric arcs, flash fires, explosions, molten metal splashes, etc.